Friday, May 25, 2018
ISL Web Page
We eventually abandoned the idea of providing power for both an implantable lamp and a biopotential sensor from the same battery. We were able to isolate the sensor from the lamp power by loading two batteries and an optical isolator onto the implant, but the result was cumbersome. And in any case: it is not clear that there is any need for an animal implant that detects biopotential events, such as an epileptic seizure, and responds with optical stimulus. In animal studies, the detection and response can be managed outside the animal, in an external and much more powerful computer. Our solution to the detection and stimulus problem is to implant two separate devices in one animal: an Implantable Stimulator-Transponder and a Subcutaneous Transmitter.

Friday, November 17, 2017
Lamp Lead Corrosion
We leave an A3030E inactive in tap water for three days with the two lamp pins separated by 5 mm. We see a white residue on the L− pin. After a week, the pin is covered with green residue. It breaks in half when we try to scrub it clean.

Figure: Corrosion of Negative Lamp Joint after Three Days In Water.
The charging diodes D4 and D3 CMDSH2-3 are reverse-biased, but they are Schottky diodes chosen for their low forward voltage during charging, and their reverse leakage current is of order 2 μA. This current flows out of the L− lead. Hydroxide ions in the water give up an electron to carry the current, resulting in a metal oxide and half a hydrogen gas molecule. The stainless steel springs do not corrode, even though we expect iron to corrode preferentially to copper during voltage=driven corrosion.

Figure: Recharging Diodes. Diodes D3 and D4 conduct during charging. Their reverse leakage current flows between the lamp pins through water when the device is inactive.
We encapsulate two lamp leads with an LED in clear epoxy. We attach the lamp to E157.3. We cover with 1.2% saltwater and pull with 1 N force on the leads 200 times. The next day, we pull 10 more times. We can see a water film around the lamp leads where they pass through the epoxy. We observe lamp artifact of 800 μVpp when we place the EEG leads in the saltwater without the grounding spring and 40 μVpp with the grounding spring. The figure below shows the LED leads and solder joints after one day and ten days.


>Figure: Lamp Encapsulated in Clear Epoxy, Immersed in Saltwater. Top: Day One. Bottom: Day Ten. Note the clear epoxy dome of the LED is almost invisible now that it is immersed in a larger body of clear epoxy.
After fourteen days, we pull the purple and orange wires out of our epoxy fixture. The purple wire snaps where we scratched it to remove insulation. The orange wire breaks at the edge of the solder joint. We remove silicone from the end of the purple lead and examine the steel. The surface is untarnished.
A better choice of diode would be one with far lower leakage current, such as a PN-junction small-signal diode. We connect the cathode of a 1N4448 to +3V, a wire to the anode, and a wire to 0V. We put the far ends of the wires in water. The anode wire models the L− wire in the A3030E, but the 1N4448 reverse leakage current is of order 20 nA. After two weeks, we see no corrosion on the wires.
The corrosion caused by the 2-μA leakage current of the CMDSH2-3 does not spread to the stainless steel of the leads and is suppressed cement on the surface of the copper parts. In future versions of the ISL, however, we will use low-leakage silicone diodes in the battery recharge circuit so as to avoid electrically-induced corrosion altogether.
Figure: Corrosion of Negative Lamp Joint after Three Days In Water.
The charging diodes D4 and D3 CMDSH2-3 are reverse-biased, but they are Schottky diodes chosen for their low forward voltage during charging, and their reverse leakage current is of order 2 μA. This current flows out of the L− lead. Hydroxide ions in the water give up an electron to carry the current, resulting in a metal oxide and half a hydrogen gas molecule. The stainless steel springs do not corrode, even though we expect iron to corrode preferentially to copper during voltage=driven corrosion.
Figure: Recharging Diodes. Diodes D3 and D4 conduct during charging. Their reverse leakage current flows between the lamp pins through water when the device is inactive.
We encapsulate two lamp leads with an LED in clear epoxy. We attach the lamp to E157.3. We cover with 1.2% saltwater and pull with 1 N force on the leads 200 times. The next day, we pull 10 more times. We can see a water film around the lamp leads where they pass through the epoxy. We observe lamp artifact of 800 μVpp when we place the EEG leads in the saltwater without the grounding spring and 40 μVpp with the grounding spring. The figure below shows the LED leads and solder joints after one day and ten days.
>Figure: Lamp Encapsulated in Clear Epoxy, Immersed in Saltwater. Top: Day One. Bottom: Day Ten. Note the clear epoxy dome of the LED is almost invisible now that it is immersed in a larger body of clear epoxy.
After fourteen days, we pull the purple and orange wires out of our epoxy fixture. The purple wire snaps where we scratched it to remove insulation. The orange wire breaks at the edge of the solder joint. We remove silicone from the end of the purple lead and examine the steel. The surface is untarnished.
A better choice of diode would be one with far lower leakage current, such as a PN-junction small-signal diode. We connect the cathode of a 1N4448 to +3V, a wire to the anode, and a wire to 0V. We put the far ends of the wires in water. The anode wire models the L− wire in the A3030E, but the 1N4448 reverse leakage current is of order 20 nA. After two weeks, we see no corrosion on the wires.
The corrosion caused by the 2-μA leakage current of the CMDSH2-3 does not spread to the stainless steel of the leads and is suppressed cement on the surface of the copper parts. In future versions of the ISL, however, we will use low-leakage silicone diodes in the battery recharge circuit so as to avoid electrically-induced corrosion altogether.
Friday, September 22, 2017
Artifact and Fatigue
The photograph below shows the A3030E lamp leads with ground spring, strain relief, and collars. Each lamp lead we wrap around one coil of the spring. When cemented in a head fixture, the spring will be rigid and the wrap of the lamp leads will provide strain relief for the two 3-mm black head shrink collars. The collars are glued to the lamp leads.

Figure: A3030E Batch E157.3-14 Lamp Leads. We have two leads wrapped around spring coils for strain relief.
We test the above arrangement in a mock dental cement fixture, shown below. From previous mock fixtures, we learn the dental cement must be allowed to cure for fifteen minutes while stationary so as to ensure that the cement will harden while tight around the collars, leads, and spring. In order for the grounding spring to be effective at stabilizing the potential of the animal body, here represented by the water in the perti dish, at least one coil of the spring must protrude from the head fixture to make contact with the body fluids.

Figure: Mock Head Fixture for A3030E Lamp Leads and Grounding Spring.
We cover the head fixture with water and place the lamp leads in the water with bare ends. We pull on the lamp leads with a 1-N force two hundred times. We flash the lamp 50 ms pulses 10 Hz full power. Total EEG noise is 8.7 μV rms. In the EEG spectrum we see a 7-μV harmonic at 10 Hz. We pull with a 2-N force on the leads another one hundred times. The total noise increases to 31 μV rms. We have broken at least one of the collar seals, and we see a 100-μVpp triangle wave on the EEG signal. Another hundred 2-N tugs on the lamp leads and the triangle wave is 140 μVpp. We vary pulse length and obtain the plot of noise amplitude versus pulse length.

Figure: Lamp Artifact Amplitude versus Pulse Length for 10-Hz Stimulus and Head Fixture with Breached Collars. Water: EEG leads and head fixture in water. Saline: EEG leads and head fixture in 1.2% saline. Ground: EEG leads out of water, ground spring absorbing lamp current.
We tug on the lamp leads some more. The lamp turns off. We adjust the leads and it turns on again. The lamp turns off. We adjust the leads and it turns on again. The lamp lead itself is broken. We now find that data transmission is being disturbed by lamp flashes. The lamp lead silicone insulation is broken. We cannot obtain consistent measurements of lamp artifact for any given pulse length, but the artifact can be as large as 2 mV when the broken lamp lead makes direct contact with the ground spring.
We observe four stages of lamp artifact. In the Stage 1, lamp artifact is <10 μV rms. The collar seals and lamp leads are intact. In Stage 2, lamp artifact is <50 μV rms. The collar seals have been breached, but they are still tight. In Stage 3, the artifact can be as large as 200 μV rms. The collar seals are loose, with a thick layer of fluid to conduct lamp current into the ground lead. In Stage 4, the artifact can be as large as 2000 μV, reception can drop as low as 50%, and the lamp flashing is intermittent. One of the lamp leads is broken or its insulation has ripped. The current entering the ground lead is great enough to disrupt data transmission and lamp flashing.
For Stages 1 to 3, lamp artifact for 10 ms flashes at 10 Hz is <50 μV. In Stage 4, the lamp may not flashing and data transmission is failing. We reach Stage 4 only if we subject the lamp leads to so much fatigue that they break. Given that our helical leads have a long record of surviving implants of many months, we are hopeful that we will not reach Stage 4 during an ISL implantation.
Figure: A3030E Batch E157.3-14 Lamp Leads. We have two leads wrapped around spring coils for strain relief.
We test the above arrangement in a mock dental cement fixture, shown below. From previous mock fixtures, we learn the dental cement must be allowed to cure for fifteen minutes while stationary so as to ensure that the cement will harden while tight around the collars, leads, and spring. In order for the grounding spring to be effective at stabilizing the potential of the animal body, here represented by the water in the perti dish, at least one coil of the spring must protrude from the head fixture to make contact with the body fluids.
Figure: Mock Head Fixture for A3030E Lamp Leads and Grounding Spring.
We cover the head fixture with water and place the lamp leads in the water with bare ends. We pull on the lamp leads with a 1-N force two hundred times. We flash the lamp 50 ms pulses 10 Hz full power. Total EEG noise is 8.7 μV rms. In the EEG spectrum we see a 7-μV harmonic at 10 Hz. We pull with a 2-N force on the leads another one hundred times. The total noise increases to 31 μV rms. We have broken at least one of the collar seals, and we see a 100-μVpp triangle wave on the EEG signal. Another hundred 2-N tugs on the lamp leads and the triangle wave is 140 μVpp. We vary pulse length and obtain the plot of noise amplitude versus pulse length.
Figure: Lamp Artifact Amplitude versus Pulse Length for 10-Hz Stimulus and Head Fixture with Breached Collars. Water: EEG leads and head fixture in water. Saline: EEG leads and head fixture in 1.2% saline. Ground: EEG leads out of water, ground spring absorbing lamp current.
We tug on the lamp leads some more. The lamp turns off. We adjust the leads and it turns on again. The lamp turns off. We adjust the leads and it turns on again. The lamp lead itself is broken. We now find that data transmission is being disturbed by lamp flashes. The lamp lead silicone insulation is broken. We cannot obtain consistent measurements of lamp artifact for any given pulse length, but the artifact can be as large as 2 mV when the broken lamp lead makes direct contact with the ground spring.
We observe four stages of lamp artifact. In the Stage 1, lamp artifact is <10 μV rms. The collar seals and lamp leads are intact. In Stage 2, lamp artifact is <50 μV rms. The collar seals have been breached, but they are still tight. In Stage 3, the artifact can be as large as 200 μV rms. The collar seals are loose, with a thick layer of fluid to conduct lamp current into the ground lead. In Stage 4, the artifact can be as large as 2000 μV, reception can drop as low as 50%, and the lamp flashing is intermittent. One of the lamp leads is broken or its insulation has ripped. The current entering the ground lead is great enough to disrupt data transmission and lamp flashing.
For Stages 1 to 3, lamp artifact for 10 ms flashes at 10 Hz is <50 μV. In Stage 4, the lamp may not flashing and data transmission is failing. We reach Stage 4 only if we subject the lamp leads to so much fatigue that they break. Given that our helical leads have a long record of surviving implants of many months, we are hopeful that we will not reach Stage 4 during an ISL implantation.
Friday, September 1, 2017
Performance of A3030E Circuit
We have two prototypes of our A3030E Stage 8 ISL circuit. The photograph below shows circuit E8.1 with all leads loaded, including grounding spring and a temporary white LED for our pre-production tests.

Figure: Un-Encapsulated A3030E Circuit with Programming Extension.
We test all the new features of the A3030E. After a couple of minor modifications, we find these features all work. In particular, the grounding spring and differential amplifier together reduce our simulated lamp artifact to 20 μV, compared to at least 30 mV for the single-ended input of the A3030D. We claim the A3030E with its additional grounding lead will not require a collar seal around the lamp leads where they pass into the head fixture cement.
Antenna Switch: The A3030E shares a single antenna for data and commands. The crystal radio uses the antenna except when the logic chip is powered up and requests the antenna for transmission. This sharing appears to work perfectly, with no loss of either data transmission or reception compared to the two-antenna devices.
Crystal Radio: The new crystal radio layout is more compact. It provides more gain than the earlier 900-MHz crystal radios and extends the reliable command reception range from 50 cm to 80 cm.
Battery Monitor: The A3030E measures its own battery voltage using its spare ADC input channel. We are able to monitor the immediate drop in battery voltage due to turning on the lamp, and the slow decline in battery voltage due to the lamp remaining on. The battery monitor will allow the Neuroarchiver to issue a warning before the battery runs down so far that it suffers permanent damage.
Battery Recharging: We connect the L− to +8 V and the L+ lead to 0 V and charge the battery at a rate of 40 mA through the 75-Ω resistance of the lamp leads. The lead resistance and the charging diode voltage drops complicate the charging process, but with a specially-designed charger, we could re-charge them in the field in less than ten hours. As it stands, we can re-charge them in twenty-four hours with our own power supplies.
Differential Amplifier: The A3030E EEG input is a differential amplifier. In water-filled Petri dishes, a 2-V lamp switching voltage applied to both EEG inputs produced no more than 100 μV lamp artifact. The differential amplifier is, however, vulnerable to 1 MHz switching noise from lamp modulation, which we use to reduce the average power of the lamp. In air, this modulation artifact can be as large as 200 μV, but within a conducting animal body we expect it to be negligible. At 100% brightness, however, this modulation artifact does not exist.
Grounding Spring: The 3030E grounding pads allow us to attach a fifth lead to act as a ground in the tunnel made by the lamp leads as they emerge from the cement of the head fixture. We simulate an animal body with head fixture in Petri dishes. We use a tunnel resistance 100 kΩ, this being the minimum we have observed in our collar seal tests. Without the grounding spring, the separated EEG electrodes pick up 500 μV of lamp artifact. The grounding spring reduces artifact to 20 μV.
We initiated production of more circuits today, and expect to have them next week. We have a few bugs in the logic program to figure out, and the new firmware should provide one battery voltage measurement per second as part of normal operation, using the meta-data channel number fifteen.

Figure: Un-Encapsulated A3030E Circuit with Programming Extension.
We test all the new features of the A3030E. After a couple of minor modifications, we find these features all work. In particular, the grounding spring and differential amplifier together reduce our simulated lamp artifact to 20 μV, compared to at least 30 mV for the single-ended input of the A3030D. We claim the A3030E with its additional grounding lead will not require a collar seal around the lamp leads where they pass into the head fixture cement.
Antenna Switch: The A3030E shares a single antenna for data and commands. The crystal radio uses the antenna except when the logic chip is powered up and requests the antenna for transmission. This sharing appears to work perfectly, with no loss of either data transmission or reception compared to the two-antenna devices.
Crystal Radio: The new crystal radio layout is more compact. It provides more gain than the earlier 900-MHz crystal radios and extends the reliable command reception range from 50 cm to 80 cm.
Battery Monitor: The A3030E measures its own battery voltage using its spare ADC input channel. We are able to monitor the immediate drop in battery voltage due to turning on the lamp, and the slow decline in battery voltage due to the lamp remaining on. The battery monitor will allow the Neuroarchiver to issue a warning before the battery runs down so far that it suffers permanent damage.
Battery Recharging: We connect the L− to +8 V and the L+ lead to 0 V and charge the battery at a rate of 40 mA through the 75-Ω resistance of the lamp leads. The lead resistance and the charging diode voltage drops complicate the charging process, but with a specially-designed charger, we could re-charge them in the field in less than ten hours. As it stands, we can re-charge them in twenty-four hours with our own power supplies.
Differential Amplifier: The A3030E EEG input is a differential amplifier. In water-filled Petri dishes, a 2-V lamp switching voltage applied to both EEG inputs produced no more than 100 μV lamp artifact. The differential amplifier is, however, vulnerable to 1 MHz switching noise from lamp modulation, which we use to reduce the average power of the lamp. In air, this modulation artifact can be as large as 200 μV, but within a conducting animal body we expect it to be negligible. At 100% brightness, however, this modulation artifact does not exist.
Grounding Spring: The 3030E grounding pads allow us to attach a fifth lead to act as a ground in the tunnel made by the lamp leads as they emerge from the cement of the head fixture. We simulate an animal body with head fixture in Petri dishes. We use a tunnel resistance 100 kΩ, this being the minimum we have observed in our collar seal tests. Without the grounding spring, the separated EEG electrodes pick up 500 μV of lamp artifact. The grounding spring reduces artifact to 20 μV.
We initiated production of more circuits today, and expect to have them next week. We have a few bugs in the logic program to figure out, and the new firmware should provide one battery voltage measurement per second as part of normal operation, using the meta-data channel number fifteen.
Friday, July 28, 2017
Grounding the Lamp Current
In Sources of Lamp Artifact we present our understanding of how lamp artifact of order 100-mVpp appears on the ISL's EEG signal when we flash the lamp. As we have reported before, this artifact is due to current flowing from the tips of the lamp leads, along the water-coated silicone insulation of the lamp leads, through the tunnels the leads make in the dental cement, and into the animal body. From there it flowed to the A3030C/D reference terminal for EEG monitoring.

Figure: Lamp Artifact Current Flowing From L+ to X− When Lamp Is On. Voltages with respect to the implanted A3030D's 0V supply. Head fixture made of dental cement. Current in the leads is not shown.
We later tried the A3030D-LO, lamp-only version, with a Subcutaneous Transmitter A3028E to monitor EEG. We saw no lamp artifact in the EEG we recorded, as the following diagram attempts to explain.

Figure: Separate SCT for EEG, ISL without EEG for Lamp. Head fixture made of dental cement.
One way to restore the ISL's own EEG measurement is to insulate the lamp leads with a ceramic collar, as we describe here. The ceramic collar makes is hard to explant and re-use an ISL because the solvent used to dissolve dental cement will also attack the adhesive we use to bind the silicone to the ceramic. The ceramic collar is arduous to assemble, and makes implantation of the head fixture more difficult. Furthermore, although we have tested the ceramic collar for fatigue resistance with machines and water here in our laboratory, we remain uncertain as to its reliability during a two-month experiment.
We propose to eliminate the ceramic collar. Instead of blocking the lamp current, we will absorb it with a coil of wire that enters the head fixture and wraps around the lamp leads. We will use a stainless steel compression spring for the purpose. For EEG detection we will use a differential amplifier in the A3030E rather than a single-ended amplifier. The current flow in the head fixture and animal we expect to be as shown below.

Figure: Grounded Seal Arrangement. Head fixture made of dental cement.
Our initial tests of this arrangement are promising. We await the arrival of the A3030E circuits, when we will be able to test the arrangement with a differential amplifier built into the ISL.
UPDATE: Here is a prototype grounding arrangement. A stainless steel spring is coiled around two lamp leads.

Figure: Grounding Spring Coiled Around Two Leads.
We can slide the spring up and down the lamp leads, but the lamp leads are pressing outwards against the coils. If the spring protrudes from the head fixture a few millimeters, it will provide a grounding point for our EEG measurement. Because it is wrapped around the lamp leads in the tunnel they make through the head fixture cement, the spring will absorb all lamp current that might flow through the tunnel.
Figure: Lamp Artifact Current Flowing From L+ to X− When Lamp Is On. Voltages with respect to the implanted A3030D's 0V supply. Head fixture made of dental cement. Current in the leads is not shown.
We later tried the A3030D-LO, lamp-only version, with a Subcutaneous Transmitter A3028E to monitor EEG. We saw no lamp artifact in the EEG we recorded, as the following diagram attempts to explain.
Figure: Separate SCT for EEG, ISL without EEG for Lamp. Head fixture made of dental cement.
One way to restore the ISL's own EEG measurement is to insulate the lamp leads with a ceramic collar, as we describe here. The ceramic collar makes is hard to explant and re-use an ISL because the solvent used to dissolve dental cement will also attack the adhesive we use to bind the silicone to the ceramic. The ceramic collar is arduous to assemble, and makes implantation of the head fixture more difficult. Furthermore, although we have tested the ceramic collar for fatigue resistance with machines and water here in our laboratory, we remain uncertain as to its reliability during a two-month experiment.
We propose to eliminate the ceramic collar. Instead of blocking the lamp current, we will absorb it with a coil of wire that enters the head fixture and wraps around the lamp leads. We will use a stainless steel compression spring for the purpose. For EEG detection we will use a differential amplifier in the A3030E rather than a single-ended amplifier. The current flow in the head fixture and animal we expect to be as shown below.
Figure: Grounded Seal Arrangement. Head fixture made of dental cement.
Our initial tests of this arrangement are promising. We await the arrival of the A3030E circuits, when we will be able to test the arrangement with a differential amplifier built into the ISL.
UPDATE: Here is a prototype grounding arrangement. A stainless steel spring is coiled around two lamp leads.
Figure: Grounding Spring Coiled Around Two Leads.
We can slide the spring up and down the lamp leads, but the lamp leads are pressing outwards against the coils. If the spring protrudes from the head fixture a few millimeters, it will provide a grounding point for our EEG measurement. Because it is wrapped around the lamp leads in the tunnel they make through the head fixture cement, the spring will absorb all lamp current that might flow through the tunnel.
Triple Helix Leads
Instead of a sealed ceramic collar to isolate EEG from lamp power, we propose for the A3030E to add a grounding spring around the lamp leads to absorb the lamp current that leaks out of the head fixture through the tunnels in the dental cement made by the lamp leads. Running to the head fixture we would have three leads: L+, L−, and GND. The GND is the ground connection. On the A3030E circuit, GND is connected directly to the 1.2-V power supply. We consider joining these three leads together in a triple-helix lead, as shown below.

Figure: Triple-Helix Leads. Top: 1 coat on individual leads followed by 2 coats on three together. Bottom: 2 coats on individuals, 1 coat on combination.
As we report here, these leads provide perfect electrical performance. But we find it impractical to prepare the ends for application of pins and a grounding spring. We must cut the wires apart and remove silicone from each tip without damaging the lead elsewhere. For now, we plan to stick with the well-tested individual wires, and hope that they do not take up too much space.
Figure: Triple-Helix Leads. Top: 1 coat on individual leads followed by 2 coats on three together. Bottom: 2 coats on individuals, 1 coat on combination.
As we report here, these leads provide perfect electrical performance. But we find it impractical to prepare the ends for application of pins and a grounding spring. We must cut the wires apart and remove silicone from each tip without damaging the lead elsewhere. For now, we plan to stick with the well-tested individual wires, and hope that they do not take up too much space.
Lead Resistance Power Loss
So far, the ISL lamp leads for all versions of the A3030 device have been 100 mm, stretched MDC-13867A stainless steel springs with resistance ≈30 Ω. The buck converter on the A3030 supplies 5.0 V to one end of the lamp leads, the LED forward voltage is ≈3.0 V, leaving 2.0 V across the leads. Of the power delivered by the buck converter, 40% is lost in the lead resistance. In the past, we have tried to increase the maximum optical power emitted by the tip of the ISL fiber. We found that a 15 mW fiber-tip power could produce circling behavior with 2-ms pulses at 10 Hz. If we were to use 100-mm un-stretched leads, their resistance would be ≈60 Ω and fiber tip power would be 7.5 mW. We could then flash the light for 4 ms instead of 2 ms and emit the same number of photons, thus producing the same ontogenetic effect. The energy we lose in the lead resistance will be the same. In the A3030E, we propose to either increase the lead length to reduce strain on the head fixture, or to keep the lead length the same and use an un-stretched lead to achieve the same reduction of strain.

Monday, October 24, 2016
Lamp-Only ISL
In our experiments with implanted ISLs, the A3030D has been plagued by lamp artifact caused by water carrying the lamp voltage out of the head fixture and into the animal body, where it corrupts the EEG signal. Ceramic dual-bore collars around the lamp leads stop the water conduction, but the seal within the collar can still fail, and when it does, the EEG signal is compromised. The A3030D-LO is designed to remove the concern of seal failure from an optogenetics experiment by removing the EEG pick-up leads alltogether. We combine the A3030D-LO with a separate subcutaneous transmitter to monitor EEG. The EEG and lamp power circuits are now separated and their battery power supplies are floating with respect to the animal body. Failure of the collar seal will introduce some artifact into the EEG signal, but two orders of magnitude less than if the EEG X− lead is connected to the lamp power 0 V at the same time the seal breaks.
We take two A3030Ds, D7.11 and D7.6, and dismantle them both. We remove their batteries, antennas, lamp leads, and sensor leads. We load new sensor leads with collars and new antennas. We do not load EEG leads. The result is the A3030D-LO, the Lamp-Only version of the ISL. The EEG amplifier is still operational. The device will transmit data and acknowledgements.

Figure: Implantable Sensor with Lamp, Lamp-Only Version (A3030D-LO).
We take care to make sure the pins are soldered in the correct direction on the leads. Looking at this picture we see that the positive (orange) lead must be in the foreground when the pins are pointing to the left. Otherwise the implanter has to rotate the pins. The length of lead from the collar to the pin is 5 mm so the implanter will not need to fold the leads within the head fixture, but instead can build the head fixture directly over the pins and collar. The devices are encapsulated in black epoxy using our rotator procedure, and then coated in SS-5001 silicone, with extra silicone applied to the sharp corners. The result is not pretty, but it is resilient and flexible.

Figure: A3030D-LO Lamp Artifact, 10 ms pulses.
The figure above shows the artifact we see on the disconnected EEG signal when we flash a white LED with a 40-mA lamp current at 100% brightness. We will ship these two devices to ION/UCL this week.
We take two A3030Ds, D7.11 and D7.6, and dismantle them both. We remove their batteries, antennas, lamp leads, and sensor leads. We load new sensor leads with collars and new antennas. We do not load EEG leads. The result is the A3030D-LO, the Lamp-Only version of the ISL. The EEG amplifier is still operational. The device will transmit data and acknowledgements.
Figure: Implantable Sensor with Lamp, Lamp-Only Version (A3030D-LO).
We take care to make sure the pins are soldered in the correct direction on the leads. Looking at this picture we see that the positive (orange) lead must be in the foreground when the pins are pointing to the left. Otherwise the implanter has to rotate the pins. The length of lead from the collar to the pin is 5 mm so the implanter will not need to fold the leads within the head fixture, but instead can build the head fixture directly over the pins and collar. The devices are encapsulated in black epoxy using our rotator procedure, and then coated in SS-5001 silicone, with extra silicone applied to the sharp corners. The result is not pretty, but it is resilient and flexible.
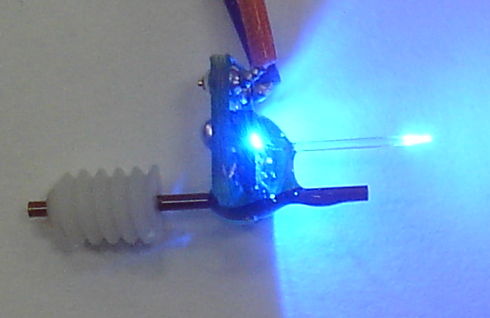
Figure: A3030D-LO Lamp Artifact, 10 ms pulses.
The figure above shows the artifact we see on the disconnected EEG signal when we flash a white LED with a 40-mA lamp current at 100% brightness. We will ship these two devices to ION/UCL this week.
Wednesday, June 22, 2016
Differential Input and Dual-Bore Collar
When we add collars to our ISL lamp leads, the collar seals last no more than a week before they break and a >30 mV lamp artifact appears. In our most recent implantation, we buried the lamp lead tips in dental cement with their collars, but without a lamp. Immediately after surgery, we observed full-scale lamp artifact, which suggests one or both seals broke as soon as the animal started to move.
We have difficulty adding collars to existing lamp leads because the leads are too thick to pass into the collar bore. We must stretch the leads by their steel wires, which compromises the elasticity of the insulation and causes the end of the lead to curl up. We now start with new lamp leads, with tapering insulation at one end, and thread these into dual-bore collars. We cut off the existing lamp leads and solder the new leads in place.
The ISL's EEG amplifier has a single-ended input. It measures the potential difference between the X+ and X− electrodes, but the X− electrode is a direct connection to the 1.2-V power supply in the ISL circuit. When the lamp lead collar seal breaks, fluid around the leads connects the surface of the skull to 5 V. The point connected to X− remains at 1.2 V. Current flows from 5 V to 1.2 V. The point connected to X+ is somewhere in the potential field generated by this current, and so we have the lamp artifact. If our ISL amplfier were truly differential, and presented a 10-MΩ impedance at both X+ and X−, the current flow to the X inputs would be greatly reduced. We would, however, still need a reference connection somewhere in the body to anchor our differential amplifier's input range, and this reference connection would re-create the problem we started with. But if we use a floating power supply for our differential amplifier, such as is provided by an indepenent SCT device, we get the near-perfect differential input without any need for a reference connection. In this way, we may be able to reduce the artifact arising from broken seals dramatically.
Our plan is to test the dual-bore collar and the floating differential EEG input in a single experiment. We have A3030Ds D7.9 and D7.11 modified as shown below, and ready to ship with (A3028E) numbers E116.7 and E116.12. We attached new lamp leads and insulated the joints with silicone. The lamp leads pass through a dual-bore collar, into which they are glued with Ultragel. We have a blue LED soldered to the ends of the lamp leads. We cut off the EEG leads and covered with silicone. The A3028Es have a pin and a bare wire for electrodes, but the choise of electrode is unimportant.

Figure: ISL and SCT Lamp Artifact Devices.
The circular A3028E has 10-MΩ input impedance and will measure lamp artifact with a power supply independent of the ISL. We have not joined the EEG leads along their length, thus reducing their sensitivity to magnetic fields, because at this point we know the >1 mV lamp artifact is generated by electrical conduction through water around the lamp leads, not by the lamp lead's magnetic field. The ISL itself measures only the internal electronic lamp artifact of the ISL circuit. Its EEG leads are cut off and sealed.
We put our two ISLs in water and start them producing 10-ms pulses at 10 Hz. We record their EEG input with the LEDs out of the water and with the LED in the water.


Figure: Two ISLs Flashing, Insulated EEG Leads. Left: lamp out of water. Right: lamp in water.
We put the two SCTs in the water and measure artifact with the LEDs out of the water and in the water.


Figure: One ISLs Flashing, Two SCTs in Water. Left: lamp out of water. Right: lamp in water.
With the lamp in the water, we have the No7 (salmon) EEG pick-up electrodes 10 mm from the exposed terminals of the LED, an the No6 (brown) electrodes are 40 mm away. In the 40-mm case, if we were to use the ISL's own amplifier, we would see artifact of >27 mV. With our floating EEG input we see roughly 3 mV. We ship these components to ION. If the collar seals are effective, we should see less than 100 μV artifact on the SCT amplifiers. If the collar seals break, we should see something between 100 μV and 3 mV artifact, depending upon the resistance of the fluid that penetrates the collar.
UPDATE: [09-AUG-16] We implant ISL D7.9 and SCT E116.7 at ION/UCL. The ISL's EEG leads are cut short and sealed. The SCT EEG electrodes are on the skull. The ISL's LED is embedded in a dental cement head fixture, with the dual-bore collar within the cement. Six days after implantation we see the following artifact during lamp stimulation.

Figure: Lamp Stimulation Artifact with Brightness, Simultaneous in SCT and ISL. Six days after surgery. Pulse length 20 ms, interval 50 ms, 200 pulses. Left: from SCT E116.7, right: from ISL D7.9.
The artifact in the ISL reaches a maximum at 40% brightness, which is a characteristic fo the electronic artifact generated within the ISL circuit. Its amplitude is of order 100 μV. There is no sign of artifact in the SCT recording. We look at the spectrum of the SCT signal over eight seconds during 100% brightness and see no sign of a peak at 20 Hz (50 ms period), which means the lamp artifact in the SCT recording is <10 μV.
We implant D7.11 and E116.12 in another rat. This time, the EEG leads of the ISL are cut short but not sealed, so that the wire tips are several millimeters apart in the abdomen and exposed to body fluid. Two hours after implantation we observe the following lamp artifact.

Figure: Lamp Stimulation Artifact, Simultaneous in SCT and ISL. Two hours after surgery. Ten pulses of 10 ms, interval 100 ms. Red: from SCT E116.12, Gray: from ISL D7.11.
The artifact in the SCT signal remains <10 μV. But the artifact in the ISL signal is of order 20 mV. If the collar seals were to break, current would flow from the head fixture to the ISL's X− input, which is connected to the ISL's 1.2-V power supply. A potential field will develop through the animal's body. The SCT electrodes on the skull, being of order 10 mm apart, will pick up this pulsing potential field, as will the ISL's X+ electrode, which is a few millimeters from X−. But we see no artifact in the SCT EEG, so the artifact cannot be caused by a break in the collar seal. Instead, we suspect that the seal around our lamp lead solder joints has failed after minimal fatigue or handling, and the result is a pulsing current between an exposed lamp power lead and the ISL's X−. The ISL's X+, being nearby, picks up this field, but the SCT's EEG electrodes, being far away on the skull, do not pick it up.
We have difficulty adding collars to existing lamp leads because the leads are too thick to pass into the collar bore. We must stretch the leads by their steel wires, which compromises the elasticity of the insulation and causes the end of the lead to curl up. We now start with new lamp leads, with tapering insulation at one end, and thread these into dual-bore collars. We cut off the existing lamp leads and solder the new leads in place.
The ISL's EEG amplifier has a single-ended input. It measures the potential difference between the X+ and X− electrodes, but the X− electrode is a direct connection to the 1.2-V power supply in the ISL circuit. When the lamp lead collar seal breaks, fluid around the leads connects the surface of the skull to 5 V. The point connected to X− remains at 1.2 V. Current flows from 5 V to 1.2 V. The point connected to X+ is somewhere in the potential field generated by this current, and so we have the lamp artifact. If our ISL amplfier were truly differential, and presented a 10-MΩ impedance at both X+ and X−, the current flow to the X inputs would be greatly reduced. We would, however, still need a reference connection somewhere in the body to anchor our differential amplifier's input range, and this reference connection would re-create the problem we started with. But if we use a floating power supply for our differential amplifier, such as is provided by an indepenent SCT device, we get the near-perfect differential input without any need for a reference connection. In this way, we may be able to reduce the artifact arising from broken seals dramatically.
Our plan is to test the dual-bore collar and the floating differential EEG input in a single experiment. We have A3030Ds D7.9 and D7.11 modified as shown below, and ready to ship with (A3028E) numbers E116.7 and E116.12. We attached new lamp leads and insulated the joints with silicone. The lamp leads pass through a dual-bore collar, into which they are glued with Ultragel. We have a blue LED soldered to the ends of the lamp leads. We cut off the EEG leads and covered with silicone. The A3028Es have a pin and a bare wire for electrodes, but the choise of electrode is unimportant.
Figure: ISL and SCT Lamp Artifact Devices.
The circular A3028E has 10-MΩ input impedance and will measure lamp artifact with a power supply independent of the ISL. We have not joined the EEG leads along their length, thus reducing their sensitivity to magnetic fields, because at this point we know the >1 mV lamp artifact is generated by electrical conduction through water around the lamp leads, not by the lamp lead's magnetic field. The ISL itself measures only the internal electronic lamp artifact of the ISL circuit. Its EEG leads are cut off and sealed.
We put our two ISLs in water and start them producing 10-ms pulses at 10 Hz. We record their EEG input with the LEDs out of the water and with the LED in the water.
Figure: Two ISLs Flashing, Insulated EEG Leads. Left: lamp out of water. Right: lamp in water.
We put the two SCTs in the water and measure artifact with the LEDs out of the water and in the water.
Figure: One ISLs Flashing, Two SCTs in Water. Left: lamp out of water. Right: lamp in water.
With the lamp in the water, we have the No7 (salmon) EEG pick-up electrodes 10 mm from the exposed terminals of the LED, an the No6 (brown) electrodes are 40 mm away. In the 40-mm case, if we were to use the ISL's own amplifier, we would see artifact of >27 mV. With our floating EEG input we see roughly 3 mV. We ship these components to ION. If the collar seals are effective, we should see less than 100 μV artifact on the SCT amplifiers. If the collar seals break, we should see something between 100 μV and 3 mV artifact, depending upon the resistance of the fluid that penetrates the collar.
UPDATE: [09-AUG-16] We implant ISL D7.9 and SCT E116.7 at ION/UCL. The ISL's EEG leads are cut short and sealed. The SCT EEG electrodes are on the skull. The ISL's LED is embedded in a dental cement head fixture, with the dual-bore collar within the cement. Six days after implantation we see the following artifact during lamp stimulation.
Figure: Lamp Stimulation Artifact with Brightness, Simultaneous in SCT and ISL. Six days after surgery. Pulse length 20 ms, interval 50 ms, 200 pulses. Left: from SCT E116.7, right: from ISL D7.9.
The artifact in the ISL reaches a maximum at 40% brightness, which is a characteristic fo the electronic artifact generated within the ISL circuit. Its amplitude is of order 100 μV. There is no sign of artifact in the SCT recording. We look at the spectrum of the SCT signal over eight seconds during 100% brightness and see no sign of a peak at 20 Hz (50 ms period), which means the lamp artifact in the SCT recording is <10 μV.
We implant D7.11 and E116.12 in another rat. This time, the EEG leads of the ISL are cut short but not sealed, so that the wire tips are several millimeters apart in the abdomen and exposed to body fluid. Two hours after implantation we observe the following lamp artifact.
Figure: Lamp Stimulation Artifact, Simultaneous in SCT and ISL. Two hours after surgery. Ten pulses of 10 ms, interval 100 ms. Red: from SCT E116.12, Gray: from ISL D7.11.
The artifact in the SCT signal remains <10 μV. But the artifact in the ISL signal is of order 20 mV. If the collar seals were to break, current would flow from the head fixture to the ISL's X− input, which is connected to the ISL's 1.2-V power supply. A potential field will develop through the animal's body. The SCT electrodes on the skull, being of order 10 mm apart, will pick up this pulsing potential field, as will the ISL's X+ electrode, which is a few millimeters from X−. But we see no artifact in the SCT EEG, so the artifact cannot be caused by a break in the collar seal. Instead, we suspect that the seal around our lamp lead solder joints has failed after minimal fatigue or handling, and the result is a pulsing current between an exposed lamp power lead and the ISL's X−. The ISL's X+, being nearby, picks up this field, but the SCT's EEG electrodes, being far away on the skull, do not pick it up.
Tuesday, March 15, 2016
Lead Flexing Machine
We have four single-bore ceramic collars cemented with silicone to four leads. The two small collars are 1.0 mm ID (inner diameter), 2.3 mm OD (outer diameter), and 3.2 mm long. They will slide over leads with only three coats of silicone. The two large collars are 1.7 mm ID, 4.3 mm OD, and 4.8 mm long. They slide over any lead. Both beads have a concave side and a convex side. We slide the lead into the concave side. We coat the lead with silicone and slide in and out until we see silicone on the lead on both sides of the bead. The concave side holds a body of silicone around the lead. We hand to cure. The results are shown below.

Figure: Single-Bore Ceramic Collars. The gray marks on the collars show where we have scraped silicone off the outer surfaces.
Once cured, we note that silicone has crept half-way up the outside of the collars. We scrape the silicone off with a scalpel. Cut cut the short ends to the same length, remove 2 mm of silicone to expose the wires, and cement into a tub of dental cement all together. We place in water and set up a motor-driven wire-flexer that pulls on the leads while they sit in a beaker of water. We clamp the leads 50 mm from the collars and we streth them by 10 mm once per second.

Figure: Wire Flexing. We are measuring isolation of the orange lead while flexing all four leads by 20% once per second.
After thirty seconds, we measure isolation resistance of each lead with respect to the water in which the cement fixture is immersed. For the blue, red, and purple leads, the isolation is only 1 MΩ, indicating the seal between the silicone and ceramic has broken. We are seeing the resistance of the microscopic film of water between the lead and the collar. The orange lead's isolation is >100 GΩ. We put the cement fixture in our ove at 60°C. After half an hour, we place in water again and isolation resistance is >100 GΩ for all four leads. We begin flexing. Within thirty seconds, isolation resistance is 1 MΩ for blue, red, and purple. The isolation of the orange lead remains >100 GΩ after 3600 s of flexing.
The fit between the lead and the collar in the previous four examples was tight only in the case of one of the smaller collars, although we did not make note of whether it was the orange or the purple. The only way to make the fit tight is to start with a lead of tapering thickness. We have eight such leads. We make four tight-fitting collars with silicone as adhesive and leave to cure in warm humidity. Another possible source of failure in the collars we glue in place with silicone is failure of the seal outside the collar because of silicone residue on the ceramic surface. We make another four and glue with Loctite Ultragel. We allow the glue to cure in warm humidity for one hour. We assemble into a dental cement head fixture and load into the wire flexer. We connect all four free ends of the leads together to our isolation meter. All four isolation resistances in parallel are 3 GΩ. After 600 s, combined isolation is 4 GΩ. After 5000 s, it is >100 GΩ. We leave the flexer running.
UPDATE: [16-MAR-16] After 18 hrs of flexing, leads 1-3 of our set of 4 have broken by fatigue where they pass over the lip of the beaker in our wire-flexing apparatus. Lead 4 is intact, with isolation resistance >100 GΩ. We remove silicone from the free ends of the other leads, and isolation resistance is >100 GΩ for all three. In one case, we have 65,000 flexes and the collar seal is still intact. In the other three cases, we have failure of the spring by fatigue before the collar seal fails by fatigue.

Figure: Four Surviving Collars. Leads 1-3 broke by fatigue some time between 5k and 65k flexes. Lead 4 survived 65k flexes.
UPDATE: [17-MAR-16] We left the four collars in water overnight. Their combined isolation resistance is >100 GΩ. We also have four collars cemented to leads with silicone dispersion. All four have a layer of silicone roughly 50 μm thick on the outer surface at the ends of the collar. We pull on the collars and find that the cement in three of them breaks easily, and in one of them a good tug gets it free. Given the success of the Loctite Ultragel cement, we abandon the silicone cement.
Figure: Single-Bore Ceramic Collars. The gray marks on the collars show where we have scraped silicone off the outer surfaces.
Once cured, we note that silicone has crept half-way up the outside of the collars. We scrape the silicone off with a scalpel. Cut cut the short ends to the same length, remove 2 mm of silicone to expose the wires, and cement into a tub of dental cement all together. We place in water and set up a motor-driven wire-flexer that pulls on the leads while they sit in a beaker of water. We clamp the leads 50 mm from the collars and we streth them by 10 mm once per second.
Figure: Wire Flexing. We are measuring isolation of the orange lead while flexing all four leads by 20% once per second.
After thirty seconds, we measure isolation resistance of each lead with respect to the water in which the cement fixture is immersed. For the blue, red, and purple leads, the isolation is only 1 MΩ, indicating the seal between the silicone and ceramic has broken. We are seeing the resistance of the microscopic film of water between the lead and the collar. The orange lead's isolation is >100 GΩ. We put the cement fixture in our ove at 60°C. After half an hour, we place in water again and isolation resistance is >100 GΩ for all four leads. We begin flexing. Within thirty seconds, isolation resistance is 1 MΩ for blue, red, and purple. The isolation of the orange lead remains >100 GΩ after 3600 s of flexing.
The fit between the lead and the collar in the previous four examples was tight only in the case of one of the smaller collars, although we did not make note of whether it was the orange or the purple. The only way to make the fit tight is to start with a lead of tapering thickness. We have eight such leads. We make four tight-fitting collars with silicone as adhesive and leave to cure in warm humidity. Another possible source of failure in the collars we glue in place with silicone is failure of the seal outside the collar because of silicone residue on the ceramic surface. We make another four and glue with Loctite Ultragel. We allow the glue to cure in warm humidity for one hour. We assemble into a dental cement head fixture and load into the wire flexer. We connect all four free ends of the leads together to our isolation meter. All four isolation resistances in parallel are 3 GΩ. After 600 s, combined isolation is 4 GΩ. After 5000 s, it is >100 GΩ. We leave the flexer running.
UPDATE: [16-MAR-16] After 18 hrs of flexing, leads 1-3 of our set of 4 have broken by fatigue where they pass over the lip of the beaker in our wire-flexing apparatus. Lead 4 is intact, with isolation resistance >100 GΩ. We remove silicone from the free ends of the other leads, and isolation resistance is >100 GΩ for all three. In one case, we have 65,000 flexes and the collar seal is still intact. In the other three cases, we have failure of the spring by fatigue before the collar seal fails by fatigue.
Figure: Four Surviving Collars. Leads 1-3 broke by fatigue some time between 5k and 65k flexes. Lead 4 survived 65k flexes.
UPDATE: [17-MAR-16] We left the four collars in water overnight. Their combined isolation resistance is >100 GΩ. We also have four collars cemented to leads with silicone dispersion. All four have a layer of silicone roughly 50 μm thick on the outer surface at the ends of the collar. We pull on the collars and find that the cement in three of them breaks easily, and in one of them a good tug gets it free. Given the success of the Loctite Ultragel cement, we abandon the silicone cement.
Monday, February 29, 2016
Ceramic Collar
We have a double-bore ceramic tube. We break off 15 mm of it and run two fresh springs through the two bores. We coat the springs with silicone and move them in and out until the silicone penetrates all the way through the bore. We leave to cure. If silicone bonds well to ceramic, and ceramic bonds well to dental cement, we may have an effective insulating collar.
Our two springs are cemented securely in the ceramic tube by silicone. We tug with sufficient force to stretch the springs, but there is no yield in the bond between the ceramic and the steel. We put the ceramic tube in dental cement.

Figure: Two-Bore Ceramic Collar in Dental Cement.
We pull on the springs with pliers. They stretch all the way until nearly straight. The silicone bond within the ceramic tube remains intact. We pull harder and the steel tears out of the silicone. We grab the ceramic with pliers and try to break it out of the dental cement. We crack the ceramic, but the bond between the two materials does not break.
Our two springs are cemented securely in the ceramic tube by silicone. We tug with sufficient force to stretch the springs, but there is no yield in the bond between the ceramic and the steel. We put the ceramic tube in dental cement.
Figure: Two-Bore Ceramic Collar in Dental Cement.
We pull on the springs with pliers. They stretch all the way until nearly straight. The silicone bond within the ceramic tube remains intact. We pull harder and the steel tears out of the silicone. We grab the ceramic with pliers and try to break it out of the dental cement. We crack the ceramic, but the bond between the two materials does not break.
Friday, February 19, 2016
Collars Implanted
At ION on 16-FEB-16, we apply single 3-mm collars to all four leads of three A3030Ds, using the procedure described earlier. We implant D7.8 in a rat, making sure the collars are separated and no contact occurs between the leads at any point from the collar to the electrode. We cover the leads and collars with free-flowing dental cement. We apply a second coat of dental cement to build up the head fixture. We touch up around the guide cannula with a third coat. An hour after surgery we observe lamp artifact. At 0% we have a brief command-reception artifact at the beginning of the stimulation. The data transmission stops while the stimulation command is received. There is no other artifact for 0% power. As we increase the lamp power to 100%, we see 10-ms spikes of up to 200 μV.

Figure: Lamp Artifact in D7.8 One Hour after Implantation. From archive M1455643796. Pulses 10-ms at 10 Hz.
The direction of the spikes changes as we increase the lamp power. The spikes have magnetic and capacitive sources, and these sources vary in different directions as lamp power increases. The spectrum of the 100% brightness spikes is shown below.

Figure: Spectrum of Lamp Artifact. From archive M1455643796. Pulses 10-ms at 10 Hz, 100% power.
The first harmonic of the lamp artifact is a little over 10 Hz. The second harmonic is larger, which is consistent with the 10% duty cycle of the lamp stimulation. The ninth harmonic is at 93Hz, which suggests the pulse rate is 10.3 Hz rather than 10 Hz. In theory, the ISL clock should be accurate to 20 ppm, with a period resolution of 30 μs. We suspect a bug in the firmware is responsible for the 0.3-Hz error in the pulse period.
[23-FEB-16] After one week implanted, we see full-scale lamp power artifact on D7.8's EEG input. We assume that repetitive stress upon the bond between the collar and the silicone leads has caused them to fail by fatigue. We note that we did not allow sufficient time for full curing of the superglue gel before implantation, but it could be that even fully-cured superglue gel will fail in the same way. We will look into stronger and more resilient bonds between silicone and the plastic tube collar.
[25-FEB-16] Bought some silly putty, which sticks very well to silicone. But dental cement won't stick to silly putty, nor will our heat shrink tubing stick to silly putty.
[26-FEB-16] We filled the gap between a two shrink tube collars and two silicone leads with fresh silicone. The tube has not yet been shrunk. We place these under a petri dish with some water, and heat with a lamp. The silicone cures over-night in the humid air. When we tug on one of the collars, it comes off immediately, leaving cured silicone behind on the lead. We shrink the other collar. When we tug on it, the shrunk collar comes off easily as well.
We have ordered some ceramic tube to try out as a collar.
Figure: Lamp Artifact in D7.8 One Hour after Implantation. From archive M1455643796. Pulses 10-ms at 10 Hz.
The direction of the spikes changes as we increase the lamp power. The spikes have magnetic and capacitive sources, and these sources vary in different directions as lamp power increases. The spectrum of the 100% brightness spikes is shown below.
Figure: Spectrum of Lamp Artifact. From archive M1455643796. Pulses 10-ms at 10 Hz, 100% power.
The first harmonic of the lamp artifact is a little over 10 Hz. The second harmonic is larger, which is consistent with the 10% duty cycle of the lamp stimulation. The ninth harmonic is at 93Hz, which suggests the pulse rate is 10.3 Hz rather than 10 Hz. In theory, the ISL clock should be accurate to 20 ppm, with a period resolution of 30 μs. We suspect a bug in the firmware is responsible for the 0.3-Hz error in the pulse period.
[23-FEB-16] After one week implanted, we see full-scale lamp power artifact on D7.8's EEG input. We assume that repetitive stress upon the bond between the collar and the silicone leads has caused them to fail by fatigue. We note that we did not allow sufficient time for full curing of the superglue gel before implantation, but it could be that even fully-cured superglue gel will fail in the same way. We will look into stronger and more resilient bonds between silicone and the plastic tube collar.
[25-FEB-16] Bought some silly putty, which sticks very well to silicone. But dental cement won't stick to silly putty, nor will our heat shrink tubing stick to silly putty.
[26-FEB-16] We filled the gap between a two shrink tube collars and two silicone leads with fresh silicone. The tube has not yet been shrunk. We place these under a petri dish with some water, and heat with a lamp. The silicone cures over-night in the humid air. When we tug on one of the collars, it comes off immediately, leaving cured silicone behind on the lead. We shrink the other collar. When we tug on it, the shrunk collar comes off easily as well.
We have ordered some ceramic tube to try out as a collar.
Friday, December 18, 2015
Insulating Collar
Our objective is to stop water propagating along the outside of our silicone lamp leads and reaching the metal of the electrodes. We propose to put a collar around each lamp leads that is non-conducting, but which the dental cement bonds to securely. With contact between the dement and the collar, and the collar and the silicone, we would divide the water film into two parts, one in contact with the lamp power pins, the other in contact with the rest of the body.

Figure: Cross-Section of Insulating Collar. The water film around the silicone leads is interrupted by the insulating collar. The dental cement binds directly to the collar.
We try heat shrink tubing as a collar. The smallest diameter we have is 2.5 mm on the outside before we shrink it, and roughly 0.7 mm on the inside after we shrink it. Our lamp leads are 0.9-1.2 mm in diameter. When we shrink the tubing onto one of these leads, we can slide the collar up and down the lead afterwards by stretching the lead so as to reduce its diameter. We need a narrower diameter tubing or we need a way to glue the tubing to the silicone. Setting that problem aside for now, we put some tubing in dental cement to see if we get good wetting of the plastic surface by the cement.

Figure: Adherence of Dental Cement (Acrylic) to Heat Shrink Tubing.
When we try to pull the tubing out of the cement, it breaks at the top surface of the glue, leaving the rest inside. We put collars on two silicone leads. The leads have bare spring terminations. We glue the collars into dental cement, as shown below. Because of the collars, the two leads become separated by a layer of dental cement, which surrounds the collars by capillary action of the acrylic. Resistance between the two leads is >40 MΩ.

Figure: Collars Glued Into Dental Cement.
When the cement has hardened, we put the cup and leads in water at 60°C for half an hour, to allow water to penetrate wherever it can by capillary action. Resistance is >40 MΩ. We put the beaker on our bench and measure the resistance as time goes by. Fifty minutes after first contact with water, the wires are still insulated from one another. We add salt. Resistance between two pins 1 cm apart is now less than 1 kΩ. With the cement still in salt water, we hold it in place and pull on the two leads one hundred times. Insulation is intact. After another ten minutes, insulation is still intact.
We pull the silicone off our epoxy-sealed head fixture. We cut back the lamp leads on D7.7 and attach another set of pins. We add a collar to each lead, connect the pins to the head fixture, and encapsulate in dental cement. Once the cement is hardened, we break the cement out of its red plastic cup. We immerse in hot water, see here. We pull on the lamp leads 100 times. Lamp artifact with 100% brightness is a few hundred microvolts, and consistent with no conduction between the lamp leads and the EEG leads. We put the ISL with head fixture, and the two-wire apparatus, in saltwater for the weekend.
UPDATE: [22-DEC-15] After four days in saltwater, we see 100-mV artifact when flashing the head fixture. The resistance between each wire and the surrounding water is around 5 MΩ. The resistance between the blue wire and the water is >40 MΩ, but between the red wire and the water is only 10 MΩ. We use Loctite Super-Glue Gel to glue single 3-mm long collars on two blue wires, and triple 1-mm long collars on two red wires.

Figure: Triple Collars. Each collar is glued to the silicone with super-glue gel. Modelled after the triple o-ring seals we see in pacemaker connections.
Once the gel has cured, we can no longer slide the collars along the silicone. We embed the collars and wire tips in dental cement. When cured, we immerse in saltwater and arrange the free ends of the wires so we can measure easily the resistance between each wire and the water. We stretch all four leads by 15% one hundred times each while they are wet with saltwater. This stretching is within the elastic limit of the springs. We leave them for one hour. We combine a 10-V power supply with our 10-MΩ millivoltmeter to make an instrument capable of measuring resistance up to 100 GΩ. The water connection resistance is 20 GΩ for the two triple-collar red wires and >100 GΩ for the single-collar blue wires.
UPDATE: [24-DEC-15] Water connection resistances today are 100 GΩ, >100 GΩ, >100 GΩ, and >100 GΩ for red left, red right, blue left, and blue right. We connect the two red wires to D7.7's lamp power, with a blue LED in parallel. The blue LED flashes. We lower the ISL into a beaker of water with the cement fixture. We see 500 μV artifact. We do the same with the two blue wires, but connect no LED. We obtain 500 μV artifact. We pull 100 times on each of the two blue leads, stretching them by 30% each time while they are wet with saltwater. This stretching is at the elastic limit of the springs. We put the cement fixtures back in the saltwater with the ISL and observe the full-scale artifact below.

Figure: Artifact After Breaking Single-Collar Seals with 5-N Tugging. This display is centered with 65536 range, when it should be simply displayed with the same range. In simple display we see the entire waveform, in this display we are missing the tops of the artifact.
We have broken the seal. We do the same with the pair of triple-collar red wires, applying a force sufficient to stretch them by 30%, tugging 100 times. When we are done, the wires curl up because we have deformed the springs. We put the fixture back in the water and observe the same full-scale artifact. We smash open the cement fixtures. The collars are held firmly in the cement. But the wires now slide freely through the collars. The super-glue seal is broken. The leads are narrower because they have been elongated. They are no longer in compression where they pass through the collar.
The triple-collar performed no better than the single-collar. Once the super-glue seal breaks, the seal cannot recover. We would rather make a seal by compressing the silicone so forcefully that the lead cannot slide through the collar, even if we pull on it with sufficient force to stretch it by 30%. We have ordered narrower tubing and will try it when it arrives.
In the meantime, we are curious about the resistance of the shrink tubing and super-glue seal to saltwater. We assemble two single-collar seals. We measure their water contact resistance to be >100 GΩ. We put them in saltwater and set them in our oven to poach at 60°C.
UPDATE: [30-DEC-15] The two leads we left in saltwater at 60°C still provide isolation >100 GΩ. On day four of the six-day poach, we took the leads out and pulled on them one hundred times, stretching them by 15% each time. Isolation remains >100 GΩ.
UPDATE: [05-JAN-15] We have heat shrink tubing SFTW-203 in 1/16" size. Outer diameter is 2.0 mm before heating, 1.5 mm after. Inner diameter 1.5 mm before heating, 0.50 mm after. A 10.8-mm length is 10.1 mm after heating. We take a 100-mm long, 1-mm diameter silicone-insulated helical steel lead. We cut a 3-mm length of tubing and slide it onto the lead. We stretch the lead by 20 mm so its diameter reduces to around 0.8 mm, but the spring does not deform. We shrink the tubing and allow it to cool for ten seconds. We can slide the collar along the wire easily if when the wire is stretched by 20%, but the collar grips the wire when we relax the spring. We hold the 3-mm tube in one hand and the far end of the lead in the other. We pull on the collar. When the lead has stretched by 17%, the collar starts to move. We slide the collar back into place and repeat several times, obtaining similar results. We try a 10-mm collar. The spring extends by 28% before the collar slips.
We glue a 3-mm collar to the silicone lead with 3M's Vetbond. The glue does not appear to bond the silicone to the collar. We try Loctite Ultragel, allowing ten minutes to cure. We pull on the collar until the lead has extended by 33%, by which point the lead has deformed. The collar is still fixed in place. We try MED10-6607 dispersion as an adhesive. We wait one hour for it to cure and find that the collar appears to be lubricated by the silicone, which has not yet cured.
We apply 3-mm collars to two leads. We glue them in place with Ultragel. We have 3 mm of silicone insulation between the collar and the 2-mm exposed helix of steel. We encapsulate with dental cement. Keeping the cement fixture in water, we measure the resistance between the leads as we flex the leads 100 times, extending them by roughly 15% with each flex. Resistance is still >100 GΩ between each lead and the water.
CONCLUSION: It looks like a 3-mm length of the 1/16" SFTW-203 tubing with Loctite Ultragel glue provides a reliable seal against water penetration. We recommend that all four ISL leads be equipped with these collars.
Figure: Cross-Section of Insulating Collar. The water film around the silicone leads is interrupted by the insulating collar. The dental cement binds directly to the collar.
We try heat shrink tubing as a collar. The smallest diameter we have is 2.5 mm on the outside before we shrink it, and roughly 0.7 mm on the inside after we shrink it. Our lamp leads are 0.9-1.2 mm in diameter. When we shrink the tubing onto one of these leads, we can slide the collar up and down the lead afterwards by stretching the lead so as to reduce its diameter. We need a narrower diameter tubing or we need a way to glue the tubing to the silicone. Setting that problem aside for now, we put some tubing in dental cement to see if we get good wetting of the plastic surface by the cement.
Figure: Adherence of Dental Cement (Acrylic) to Heat Shrink Tubing.
When we try to pull the tubing out of the cement, it breaks at the top surface of the glue, leaving the rest inside. We put collars on two silicone leads. The leads have bare spring terminations. We glue the collars into dental cement, as shown below. Because of the collars, the two leads become separated by a layer of dental cement, which surrounds the collars by capillary action of the acrylic. Resistance between the two leads is >40 MΩ.
Figure: Collars Glued Into Dental Cement.
When the cement has hardened, we put the cup and leads in water at 60°C for half an hour, to allow water to penetrate wherever it can by capillary action. Resistance is >40 MΩ. We put the beaker on our bench and measure the resistance as time goes by. Fifty minutes after first contact with water, the wires are still insulated from one another. We add salt. Resistance between two pins 1 cm apart is now less than 1 kΩ. With the cement still in salt water, we hold it in place and pull on the two leads one hundred times. Insulation is intact. After another ten minutes, insulation is still intact.
We pull the silicone off our epoxy-sealed head fixture. We cut back the lamp leads on D7.7 and attach another set of pins. We add a collar to each lead, connect the pins to the head fixture, and encapsulate in dental cement. Once the cement is hardened, we break the cement out of its red plastic cup. We immerse in hot water, see here. We pull on the lamp leads 100 times. Lamp artifact with 100% brightness is a few hundred microvolts, and consistent with no conduction between the lamp leads and the EEG leads. We put the ISL with head fixture, and the two-wire apparatus, in saltwater for the weekend.

UPDATE: [22-DEC-15] After four days in saltwater, we see 100-mV artifact when flashing the head fixture. The resistance between each wire and the surrounding water is around 5 MΩ. The resistance between the blue wire and the water is >40 MΩ, but between the red wire and the water is only 10 MΩ. We use Loctite Super-Glue Gel to glue single 3-mm long collars on two blue wires, and triple 1-mm long collars on two red wires.
Figure: Triple Collars. Each collar is glued to the silicone with super-glue gel. Modelled after the triple o-ring seals we see in pacemaker connections.
Once the gel has cured, we can no longer slide the collars along the silicone. We embed the collars and wire tips in dental cement. When cured, we immerse in saltwater and arrange the free ends of the wires so we can measure easily the resistance between each wire and the water. We stretch all four leads by 15% one hundred times each while they are wet with saltwater. This stretching is within the elastic limit of the springs. We leave them for one hour. We combine a 10-V power supply with our 10-MΩ millivoltmeter to make an instrument capable of measuring resistance up to 100 GΩ. The water connection resistance is 20 GΩ for the two triple-collar red wires and >100 GΩ for the single-collar blue wires.
UPDATE: [24-DEC-15] Water connection resistances today are 100 GΩ, >100 GΩ, >100 GΩ, and >100 GΩ for red left, red right, blue left, and blue right. We connect the two red wires to D7.7's lamp power, with a blue LED in parallel. The blue LED flashes. We lower the ISL into a beaker of water with the cement fixture. We see 500 μV artifact. We do the same with the two blue wires, but connect no LED. We obtain 500 μV artifact. We pull 100 times on each of the two blue leads, stretching them by 30% each time while they are wet with saltwater. This stretching is at the elastic limit of the springs. We put the cement fixtures back in the saltwater with the ISL and observe the full-scale artifact below.


Figure: Artifact After Breaking Single-Collar Seals with 5-N Tugging. This display is centered with 65536 range, when it should be simply displayed with the same range. In simple display we see the entire waveform, in this display we are missing the tops of the artifact.
We have broken the seal. We do the same with the pair of triple-collar red wires, applying a force sufficient to stretch them by 30%, tugging 100 times. When we are done, the wires curl up because we have deformed the springs. We put the fixture back in the water and observe the same full-scale artifact. We smash open the cement fixtures. The collars are held firmly in the cement. But the wires now slide freely through the collars. The super-glue seal is broken. The leads are narrower because they have been elongated. They are no longer in compression where they pass through the collar.
The triple-collar performed no better than the single-collar. Once the super-glue seal breaks, the seal cannot recover. We would rather make a seal by compressing the silicone so forcefully that the lead cannot slide through the collar, even if we pull on it with sufficient force to stretch it by 30%. We have ordered narrower tubing and will try it when it arrives.
In the meantime, we are curious about the resistance of the shrink tubing and super-glue seal to saltwater. We assemble two single-collar seals. We measure their water contact resistance to be >100 GΩ. We put them in saltwater and set them in our oven to poach at 60°C.
UPDATE: [30-DEC-15] The two leads we left in saltwater at 60°C still provide isolation >100 GΩ. On day four of the six-day poach, we took the leads out and pulled on them one hundred times, stretching them by 15% each time. Isolation remains >100 GΩ.
UPDATE: [05-JAN-15] We have heat shrink tubing SFTW-203 in 1/16" size. Outer diameter is 2.0 mm before heating, 1.5 mm after. Inner diameter 1.5 mm before heating, 0.50 mm after. A 10.8-mm length is 10.1 mm after heating. We take a 100-mm long, 1-mm diameter silicone-insulated helical steel lead. We cut a 3-mm length of tubing and slide it onto the lead. We stretch the lead by 20 mm so its diameter reduces to around 0.8 mm, but the spring does not deform. We shrink the tubing and allow it to cool for ten seconds. We can slide the collar along the wire easily if when the wire is stretched by 20%, but the collar grips the wire when we relax the spring. We hold the 3-mm tube in one hand and the far end of the lead in the other. We pull on the collar. When the lead has stretched by 17%, the collar starts to move. We slide the collar back into place and repeat several times, obtaining similar results. We try a 10-mm collar. The spring extends by 28% before the collar slips.
We glue a 3-mm collar to the silicone lead with 3M's Vetbond. The glue does not appear to bond the silicone to the collar. We try Loctite Ultragel, allowing ten minutes to cure. We pull on the collar until the lead has extended by 33%, by which point the lead has deformed. The collar is still fixed in place. We try MED10-6607 dispersion as an adhesive. We wait one hour for it to cure and find that the collar appears to be lubricated by the silicone, which has not yet cured.
We apply 3-mm collars to two leads. We glue them in place with Ultragel. We have 3 mm of silicone insulation between the collar and the 2-mm exposed helix of steel. We encapsulate with dental cement. Keeping the cement fixture in water, we measure the resistance between the leads as we flex the leads 100 times, extending them by roughly 15% with each flex. Resistance is still >100 GΩ between each lead and the water.
CONCLUSION: It looks like a 3-mm length of the 1/16" SFTW-203 tubing with Loctite Ultragel glue provides a reliable seal against water penetration. We recommend that all four ISL leads be equipped with these collars.
Friday, December 11, 2015
Sealing the Lamp Leads
Following our discovery of conduction through tunnels, we perform the following experiment to test if we can, during implantation, seal the ends of the lamp leads with silicone. We make a head fixture with no guide cannula or fiber. We seal the LED with clear epoxy. We hold the fixture with the LED downwards and connect the leads of our D7.7 ISL, like this. We apply MED10-6607 silicone dispersion until it almost drips off the underside, see here. We allow the silicone to cure. After ten minutes it looks like this. After twenty, as below.

Figure: Silicone Around Lamp Leads, Twenty Minutes After Application.
We apply dental cement, allowing it to run off the underside. We start with thin cement, then thicken and make sure we cover the top side. The result is shown below. We note an obvious tunnel into the cement between the two lamp leads.

Figure: First Coat of Dental Cement over Head Fixture.
We allow the cement to cure for twenty minutes. We note that the pads around the LED are still exposed on the bottom side. We place the ISL and head fixture in water and observe full-scale lamp artifact. We surround the entire fixture with cement.

Figure: Encapsulating Coat of Dental Cement.
We let the above cement cure for ten minutes, then we place the ISL and head fixture in water. We get the following lamp artifact after one minute.

Figure: Lamp Noise Just After Dropping in Water.
We put hot water in the beaker. We take out the ISL and flex its lamp leads twenty or thirty times. We put the ISL and head fixture back in the water and let it settle down. We see the artifact below.

Figure: Lamp Noise 20 Minutes After Dropping in Water.
We move the EEG leads out of the water and record noise. We get this, which is pretty much the same as with the leads in the water. We wrap the lamp leads around in a loop with the EEG leads and put everything in the hot water. No change to the noise. We wait one hour to give capillary action time to move water into the dental cement.
Figure: Lamp Noise One Hour After Dropping in Hot Water. Range 800 μV, Interval 1 s, Pulses 50 ms, Pulse Period 500 ms. From top-left to bottom right: Lamp stimulus off, stimulus with 0% brightness, 20%, 40%, 60%, 80%, 100%, 100% with EEG leads out of water.
We see the artifact reversing direction as we increase the lamp current. If we re-arrange the leads, the artifact changes.

Figure: Lamp Noise for 100% Brightness After Rearranging Leads. Range 800 μV, Interval 1 s, Pulses 50 ms, Pulse Period 500 ms.
We now encapsulate the EEG leads with dental cement. When we immerse in water, the artifact remains much the same. It appears that our silicone sealing of the lamp leads has increased the resistance between the lamp power terminals and the water in the beaker.
UPDATE [14-DEC-15]: After 72 hours soaking in water, we flash the lamp power artifact has increased by at least a factor of ten, perhaps a hundred.

Figure: Lamp Noise 72 Hours After Dropping in Water.
UPDATE [15-DEC-15]: After a one-hour dry bake at 60°C, lamp noise for 100% brightness in water has dropped back to normal amplitude. We prepare another head fixture and cover all electrical pads on its top and bottom surfaces with clear DB270 epoxy, see below.

Figure: Epoxy Sealing of Head Fixture Conducting Surfaces.
We coated both sides, but stayed clear of the two sockets. We used a thin wire to apply epoxy between the sockets and the LED footprint. We cut the existing head fixture and cemented pins off D7.7 and solder new pins to the lamp leads. We strip and tin the EEG leads.
UPDATE [18-DEC-15] We connect lamp leads to the head fixture shown above and flash the light. We cover the pins and sockets with silicone. We wait twenty minutes, with the silicone curing above a bath of warm water. We touch the silicone with tweezers and note that it is not yet tack-free. If we were to apply dental cement, we would disturb and compormise the silicone coating. After one hour, it is tack-free. We lower the entire assembly and ISL and EEG leads into water and observe lamp full-scale lamp noise. We put the lamp in our mouth and cannot taste the signal, which means it must be less than 500 mV. So we suspect we are seeing lamp noise on the EEG of order 100 mV. We feel sharp edges around the corners of the circuit board. The silicone is discolored, because it has not had sufficient time to cure. We conclude that applying one coat of silicone during surgery is not sufficient to seal the lamp power electrodes.


Figure: Silicone Around Lamp Leads, Twenty Minutes After Application.
We apply dental cement, allowing it to run off the underside. We start with thin cement, then thicken and make sure we cover the top side. The result is shown below. We note an obvious tunnel into the cement between the two lamp leads.
Figure: First Coat of Dental Cement over Head Fixture.
We allow the cement to cure for twenty minutes. We note that the pads around the LED are still exposed on the bottom side. We place the ISL and head fixture in water and observe full-scale lamp artifact. We surround the entire fixture with cement.
Figure: Encapsulating Coat of Dental Cement.
We let the above cement cure for ten minutes, then we place the ISL and head fixture in water. We get the following lamp artifact after one minute.
Figure: Lamp Noise Just After Dropping in Water.
We put hot water in the beaker. We take out the ISL and flex its lamp leads twenty or thirty times. We put the ISL and head fixture back in the water and let it settle down. We see the artifact below.
Figure: Lamp Noise 20 Minutes After Dropping in Water.
We move the EEG leads out of the water and record noise. We get this, which is pretty much the same as with the leads in the water. We wrap the lamp leads around in a loop with the EEG leads and put everything in the hot water. No change to the noise. We wait one hour to give capillary action time to move water into the dental cement.

 |  |  |  |
 |  |  |  |
We see the artifact reversing direction as we increase the lamp current. If we re-arrange the leads, the artifact changes.
Figure: Lamp Noise for 100% Brightness After Rearranging Leads. Range 800 μV, Interval 1 s, Pulses 50 ms, Pulse Period 500 ms.
We now encapsulate the EEG leads with dental cement. When we immerse in water, the artifact remains much the same. It appears that our silicone sealing of the lamp leads has increased the resistance between the lamp power terminals and the water in the beaker.
UPDATE [14-DEC-15]: After 72 hours soaking in water, we flash the lamp power artifact has increased by at least a factor of ten, perhaps a hundred.
Figure: Lamp Noise 72 Hours After Dropping in Water.
UPDATE [15-DEC-15]: After a one-hour dry bake at 60°C, lamp noise for 100% brightness in water has dropped back to normal amplitude. We prepare another head fixture and cover all electrical pads on its top and bottom surfaces with clear DB270 epoxy, see below.

Figure: Epoxy Sealing of Head Fixture Conducting Surfaces.
We coated both sides, but stayed clear of the two sockets. We used a thin wire to apply epoxy between the sockets and the LED footprint. We cut the existing head fixture and cemented pins off D7.7 and solder new pins to the lamp leads. We strip and tin the EEG leads.
UPDATE [18-DEC-15] We connect lamp leads to the head fixture shown above and flash the light. We cover the pins and sockets with silicone. We wait twenty minutes, with the silicone curing above a bath of warm water. We touch the silicone with tweezers and note that it is not yet tack-free. If we were to apply dental cement, we would disturb and compormise the silicone coating. After one hour, it is tack-free. We lower the entire assembly and ISL and EEG leads into water and observe lamp full-scale lamp noise. We put the lamp in our mouth and cannot taste the signal, which means it must be less than 500 mV. So we suspect we are seeing lamp noise on the EEG of order 100 mV. We feel sharp edges around the corners of the circuit board. The silicone is discolored, because it has not had sufficient time to cure. We conclude that applying one coat of silicone during surgery is not sufficient to seal the lamp power electrodes.
Tuesday, November 17, 2015
Conduction Through Tunnels
In Electrical Coupling Through Dental Cement we showed that the resistivity of dental cement, wet or dry, was too great to cause the lamp stimulation artifact we observed on X for the first few weeks after implanting D7.2. A few weeks after implanting D7.6, the lamp stimulation artifact is a full-scale square wave, as shown below.

Figure: Lamp Pulse Artifact Two Weeks After Implantation. D7.6, 0% brightness, 10-ms pulses, 100 ms period. See M1447342849.ndf.
At ION on 12-NOV-15, we implant D7.5 and note the insulated exterior of the L+ and X+ leads are touching as we are about to apply dental cement. We believe the previous two implants were done exactly the same way. This time, we move the leads apart. If they were to touch, there would be a passage through the dental cement for water to creep along and so connect X+ to L+. Half an hour after implantation, we generate 0% brightness, 10-ms long pulses, with 100 ms period and see the artifact below on the X input.

Figure: Lamp Pulse Artifact Immediately After Implantation. D7.5, 0% brightness, 10-ms pulses, 100 ms period. See M1447350049.ndf.
We see a step up on X as the lamp power turns on and a relaxation afterwards. Brightness is 0%, so L+ is connected to +5V. When we turn off lamp power, L+ relaxes as a 10-μF capacitor discharges. At no time is Q1 turned on, so at no time is the LED draining the capacitor. With 100% brightness, the artifact on X is a pulse, as shown below. With 100% brightness, L+ drops quickly at the end of a pulse because the LED is connected to L+ for 200 ns after the end of the pulse, and conduction through the LED drains the 10-μF capacitor.

Figure: Lamp Pulse Artifact Immediately After Implantation. D7.5, 100% brightness, 10-ms pulses, 100 ms period. See M1447350049.ndf.
The artifact on X is consistent with a resistive connection between L+ and X+ of around 250 kΩ (the L+ lead carries +5V pulses, the X input's two skull electrodes have resistance is of order 1 kΩ, and the pulses on X are around 20 mV). We take two silicone-insulated steel leads and solder them to the pins of a connector. We cover the connector with dental cement, but leave the solder joints exposed. We tie the two leads in a knot to make sure they are touching. We put saltwater on the joints. We cover the leads, joints, and connector pins with cement. The resistance between the two leads is >40 MΩ (the largest resistance we can measure with our voltmeter). We allow the cement to cure. The resistance is >40 MΩ. We cover with salt water. Resistance is >40 MΩ. We wait half an hour, resistance has dropped to 120 kΩ. We pour away the saltwater and dry the cement surface. Resistance is 100 kΩ. Fifteen minutes later, resistance is 150 kΩ. We bake in the oven at 60°C for half an hour and measure 130 kΩ. One hour later, the resistance is >40 MΩ.

Figure: Conduction Through Tunnels. Visible through the pink cement are two leads we wrapped together to create a passage from one lead tip to another. The pink cement is at this moment covered by clear saltwater.
We know from long experience that water creeps along passages by capillary action. In this case, we have two solder joints being connected along a 20-mm tunnel by saltwater that has crept along the tunnel walls. The resistance of this saltwater connection is 100 kΩ. When implanted, every lead emerges from the head fixture somewhere. Where it emerges, there will be body fluids. And every lead creates a tunnel along which these body fluids can creep to the exposed conductor at the end of the lead. We suggest that these water films are the source of our lamp stimulation artifact.
Figure: Lamp Pulse Artifact Two Weeks After Implantation. D7.6, 0% brightness, 10-ms pulses, 100 ms period. See M1447342849.ndf.
At ION on 12-NOV-15, we implant D7.5 and note the insulated exterior of the L+ and X+ leads are touching as we are about to apply dental cement. We believe the previous two implants were done exactly the same way. This time, we move the leads apart. If they were to touch, there would be a passage through the dental cement for water to creep along and so connect X+ to L+. Half an hour after implantation, we generate 0% brightness, 10-ms long pulses, with 100 ms period and see the artifact below on the X input.
Figure: Lamp Pulse Artifact Immediately After Implantation. D7.5, 0% brightness, 10-ms pulses, 100 ms period. See M1447350049.ndf.
We see a step up on X as the lamp power turns on and a relaxation afterwards. Brightness is 0%, so L+ is connected to +5V. When we turn off lamp power, L+ relaxes as a 10-μF capacitor discharges. At no time is Q1 turned on, so at no time is the LED draining the capacitor. With 100% brightness, the artifact on X is a pulse, as shown below. With 100% brightness, L+ drops quickly at the end of a pulse because the LED is connected to L+ for 200 ns after the end of the pulse, and conduction through the LED drains the 10-μF capacitor.
Figure: Lamp Pulse Artifact Immediately After Implantation. D7.5, 100% brightness, 10-ms pulses, 100 ms period. See M1447350049.ndf.
The artifact on X is consistent with a resistive connection between L+ and X+ of around 250 kΩ (the L+ lead carries +5V pulses, the X input's two skull electrodes have resistance is of order 1 kΩ, and the pulses on X are around 20 mV). We take two silicone-insulated steel leads and solder them to the pins of a connector. We cover the connector with dental cement, but leave the solder joints exposed. We tie the two leads in a knot to make sure they are touching. We put saltwater on the joints. We cover the leads, joints, and connector pins with cement. The resistance between the two leads is >40 MΩ (the largest resistance we can measure with our voltmeter). We allow the cement to cure. The resistance is >40 MΩ. We cover with salt water. Resistance is >40 MΩ. We wait half an hour, resistance has dropped to 120 kΩ. We pour away the saltwater and dry the cement surface. Resistance is 100 kΩ. Fifteen minutes later, resistance is 150 kΩ. We bake in the oven at 60°C for half an hour and measure 130 kΩ. One hour later, the resistance is >40 MΩ.
Figure: Conduction Through Tunnels. Visible through the pink cement are two leads we wrapped together to create a passage from one lead tip to another. The pink cement is at this moment covered by clear saltwater.
We know from long experience that water creeps along passages by capillary action. In this case, we have two solder joints being connected along a 20-mm tunnel by saltwater that has crept along the tunnel walls. The resistance of this saltwater connection is 100 kΩ. When implanted, every lead emerges from the head fixture somewhere. Where it emerges, there will be body fluids. And every lead creates a tunnel along which these body fluids can creep to the exposed conductor at the end of the lead. We suggest that these water films are the source of our lamp stimulation artifact.
Subscribe to:
Posts (Atom)